Monday, November 26, 2012

I know all my loyal fans out there have been itching to get an update on the GT6.  I know I haven't posted since June, but work has been done.  

We moved from Washington to Utah in July so it's been pretty crazy.  And just in case you were wondering, yes, it is hard to move a car that is in pieces and those pieces are strewn all over the place.  And it's even harder to pick back up where you left off after you get moved.  So it's been a little slow since we've been in Utah, but it's getting better.  

My father-in-law works for a company that owns a large warehouse that is empty for months at a time.  They have graciously allowed me to use their space and tools while it's empty.  Here's a few pictures of the car in the new space.  It's a fantastic space to work in.  
I brought the car down from Heber City where it was stored in Dad's shed for a few months and brought it here.  That's his trailer in the picture. 
You can see the size of the warehouse.  It makes my car look even smaller.  
 Dad's truck, trailer, and my car fit end to end inside the warehouse.
 For convenience, we lifted the car up with a fork lift and placed it on dollys.  Now I can move the car anywhere in the warehouse to get it out of the way if needed.
 One of the first tasks completed while here was the exhaust.  
 Twin tip mufflers.  I think they look great.  Hopefully they sound just as good.
 Again you can see the large space I get to work in.
 My carpet kit arrived during the move as well.  So here are all the pieces.  I set them on the floor so I could make sure they're all there and in the right spot.
 It's going to be fun to puzzle piece them together inside the car.
I started working on the doors.  I kept one of the doors off the parts car for a guide and reference.  I'm sure glad I did.  It came in handy.  The rest of the parts car went to scrap.
 Windows are in.  All mechanisms are in place and working.  
 And here is the passenger door hanging on the car.  Making progress!
 Although it is sweet, I removed the purple tint off the window.  It just didn't go with the car.  Plus it is probably 30 years old.  
 Starting to look like a car now that the doors are on.
And here's the driver's door. 
 The tint didn't come off too clean.  You can see the residue in the glare on the window.
 I put the rear hinges on for the rear hatch.  I'm going to wait until I have the glass in the frame to put the hatch on.  I've got the seals and rubber pieces on order.
 Started placing carpet.  
 Here's what behind the seats will look like.  The carpet looks good.  Needs a good vacuuming, but the whole car will need a good cleaning once I'm done.
 New speedometer cable and tachometer cable.
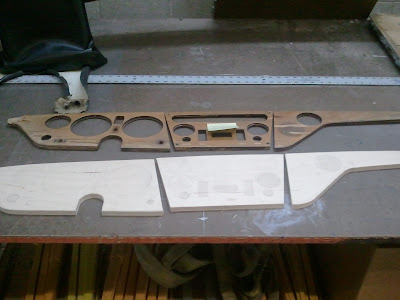
 I'm making a new dash.  We'll see how it turns out.
 We bought some vinyl and I've started recovering some of the vinyl pieces.  This is the "U" shaped piece that goes over the transmission tunnel behind the stick shift.
 Here it is in place.  And while we're at it, you can see the carpet in place.  There is a gap between the transmission tunnel and the floor.  I'm trying to get in touch with the carpet manufacturer to see if it's the wrong piece or I did something wrong.
 Here you can see the seat rails in place.  I think these Miata seats are going to go in nicely.
 Another shot of the interior carpet.
 A shot of the driver's side.  Hopefully I'll be able to work something out to cover that gap.
 So the last thing I did before the Thanksgiving holiday was to install the fuel line.  You can see the copper line running from under the car into the fuel pump.

So there you go, there's your update.  I'm anxious to get back to get the seats set and the door seals in place.  I'll keep you posted.


Sunday, June 10, 2012

Body Back on the Frame!

Here's what's going on with the GT6.  I got it back from the painter last month but had another car in my garage so I couldn't work on it.  But happy to say mom and dad made it home nice and safe with dad's TR6 and are driving it all around Utah now.  So, on to the other car.

Here's what it looked like...


Here's a picture of the finished body...


I asked the painter to put an undercoating on the bottom of the car to protect it and help with noise.  He didn't do a very good job so I bought a few cans of spray on undercoating and put some on myself.  So you get a great view of what the bottom of the car looks like.


Bry was already painting cabinets in his garage so it was nice a clear and ready for more painting.


We tipped it up on its side and sprayed away.


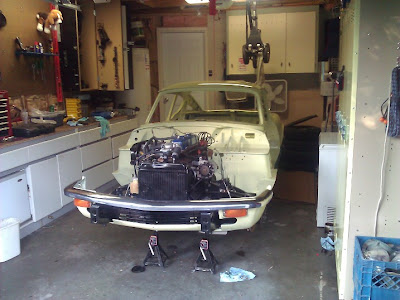
While it was drying I took a few body parts back to my garage and got to work.  My neighbor helped me push the body into the garage and got it up on jack stands.  I can't begin to tell you how excited I was at this point.  The fron pieces went on without a hitch.  


Even the front bumper and front turn signals.  Piece of cake.


Here's another view.  


Then, a few days later after some dry time and another helping hand from Bry and my neighbor Ken the body went on without a hitch.  Well, kind of.  When we were taking the car out of Bry's garage we bumped it against the ceiling and scratched the roof of the new paint job.  Bummer.


So, here's what it looks like and stuff.  


The lockers in the background are out of the Seattle Temple.  So, I guess you could call the color of my car "Temple Locker Yellow".  Not bad huh?


So, on to putting stuff on the body.  First the gas tank.  A nice new paint job on the tank and in it goes.  Pretty!


Here's a view of the cab area with the transmission showing through.  Everything at this point is still going pretty sweet.


The rear bumper and side marker lights went on piece of cake too.  This is too easy.  As I've been putting stuff on, I've been referencing the parts car I bought a long time ago to make sure I'm doing it right.  Here and there I've also been taking pieces off and either throwing them in the garbage because they're unusable, putting them on the car, or saving them for later.  Which makes Lindsay happy because that parts car is slowly going away.


Then, disaster.  It was time to start putting the wiring back in the car.  I went to the shed and got the box of wires out.  The wiring harness is in two pieces, the front and back.  The front wires go to the engine bay and dash.  The back wires go feed the rear lights and stuff.  I wanted to put the rear wires in first and pulled out the harness.  Below is what I found.  


I keep finding things about this car that just makes me wonder how it was ever driven in Hinckley.  The wiring harness had melted right through and bare wires were sticking out.  Some of the wires had fused together.  It was a mess.  Then I turned my attention to the front harness.  Below is what I saw.


More melted wires.  This part was just a melted glob of goo.  More bare wires, some barely hanging on.  I don't remember seeing this when I put them away.  I looked in my catalogs and found a new complete wiring harness would be right around $500!  Oh boy.  So once again I turn my attention to the parts car.  


It saved me!  It has a fantastic (but dirty) wiring harness.  Both front and back look great and all the connections are in good shape.  Here we go!  Anybody guess where all those wires go?  I may need your help!

Sunday, April 8, 2012

GT6 Progress! Finally!

Ok, I've got some exciting news......I got my GT6 back from the painters on Saturday!  Hooray!  Below are pictures of dad and his car he had in college.  Look closely at the color and let me know what you think of the color of my car below.


It looks so cool in the sunlight.  


Right now this is how it's stored until I can free up some room.  I can't wait to get working on it again!